REVIEW · OAHU
From Waikiki: Best of Oahu Photo Tour with Pickup
Book on GetYourGuide →Operated by Oahu Photography Tours · Bookable on GetYourGuide
In This Review
- A great view plus real photo coaching.
- Key points you’ll care about
- Waikiki pickup and the real photo game plan
- Nuuanu Pali and the Ko’olau view that frames the whole island
- Tantalus, a secret photo stop, and how the guide finds angles fast
- Waimānalo Bay and Ono Steak and Shrimp: the lunch stop with local energy
- Makapu’u Point and Halona Beach Cove: sea cliffs that don’t need filters
- Sandy’s Beach and the Halona Blowhole: the stop that turns heads
- Hawaii Kai and Leonard’s Malasada: ending with a sweet win
- Price and value: $99 for views plus real coaching
- What to bring, and what to keep out of the way
- Who this tour fits best (and who should skip it)
- Should you book this Oahu photo tour?
- FAQ
- How long is the Oahu photo tour?
- Does it include pickup from Waikiki hotels?
- Can I bring a phone or any camera?
- What are some of the main stops?
- Is lunch included?
- Is water included?
- Is the tour suitable for people with mobility impairments?
A great view plus real photo coaching.
This Oahu photo tour turns the island into a shooting plan, not a random sightseeing loop. I love the professional photo guide approach (you bring any camera, even a phone, and get practical tips fast), and I love the small-group pace that keeps you from feeling rushed at the lookouts. One heads-up: it includes short walks and uneven viewpoint areas, so it’s not a fit if mobility is limited.
Guides such as Andrew, Emily, and Kurt lead the day with a friendly, fun style, and the vibe is simple: stop, frame, shoot, and learn. You’ll get picked up around Waikiki, and this is also a solid option if you’re in port and don’t want to rent a car.
Key points you’ll care about
- Small group of up to 7 means more time for questions and hands-on photo help
- Bring any camera: you’ll get tips for phones too, including settings and how to capture action shots
- East Oahu viewpoints on purpose: Pali, Makapu’u, Halona Blowhole, Sandy’s Beach, Hawaii Kai
- Waimanalo lunch at Ono Steak and Shrimp plus a Leonard’s Malasada treat
- Pickup and drop-off across Waikiki and even cruise piers (confirm your exact pull-up spot)
You can also read our reviews of more tours and experiences in Oahu.


Waikiki pickup and the real photo game plan

This tour starts with pickup in Waikiki—most major hotels and even cruise terminal areas are covered. You’re not going to be hunting the van down on a main street. The pickup uses a designated pull-up area, so you’ll want to confirm the exact spot with the operator the day before (they ask for it), especially if your hotel is busy or the address on the map isn’t where the van actually stops.
Then you get on a comfortable van with a small group. And that matters. With only a handful of people, the guide can slow down when you need a second to understand a setting, or re-stage a shot because the light just improved.
The photo part isn’t about fancy gear or turning you into a studio photographer. It’s about getting better results in real island conditions: bright sun, salty air, dramatic cliffs, and ocean colors that can shift minute to minute. The guide spends the day teaching you how to see the scene and translate it into a photo—whether you’re using a DSLR, a compact camera, or your phone.
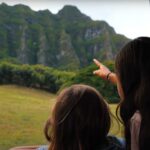
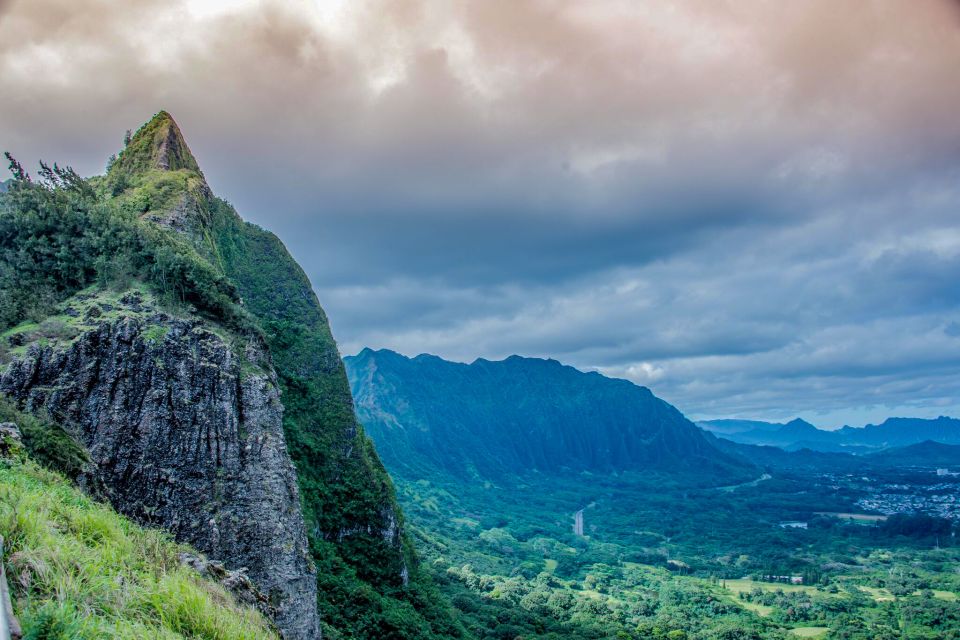
Nuuanu Pali and the Ko’olau view that frames the whole island
One of the first big viewpoint stops is Nuuʻuanu Pali Lookout. This is the kind of place where your eyes say wow, and your camera says, okay…now what. The guide helps you make that transition. You’ll get a photo stop around 20 minutes, with time to set your framing and try a couple angles instead of just standing there for one quick photo.
Why this stop works: Pali Lookout gives you depth—mountains, ridgelines, and a sense of the island’s scale. That makes it a great “learn by doing” location. If you’re practicing things like horizon level, foreground vs. background, or how to handle bright sky, this is one of those places where your corrections show up immediately.
Admission to the viewpoint area is included, so you don’t have to manage tickets or add extra stops just to get in. Just wear comfortable closed-toe shoes. The ground near viewpoints can be uneven, and you’ll be moving around to find the best angle.
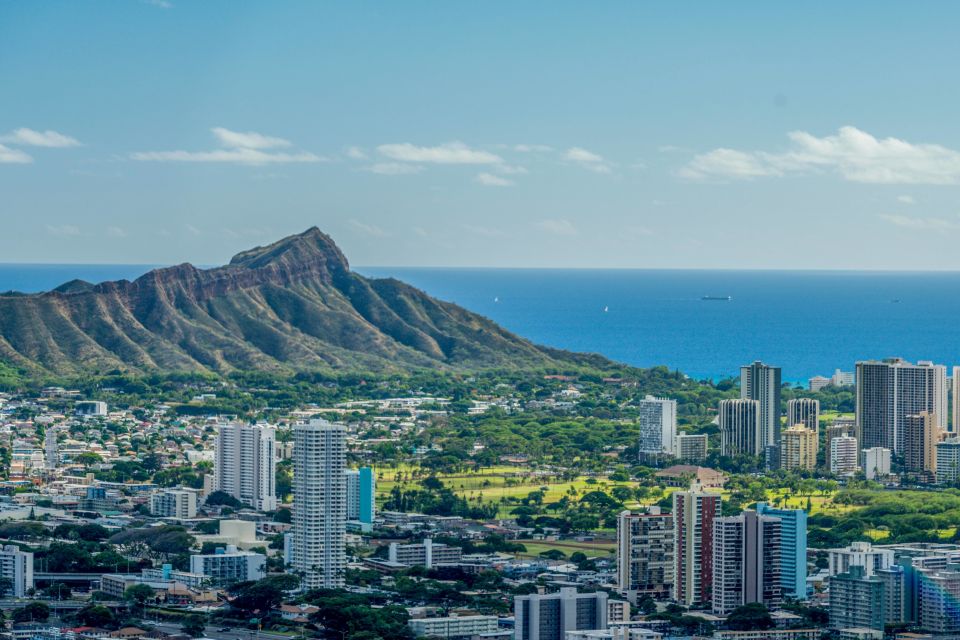
Tantalus, a secret photo stop, and how the guide finds angles fast
After the Pali area, you get more high-view opportunities, including a stop at Tantalus Lookout in Puu Ualakaa State Park. This is another one where the guide’s job is to help you see beyond the obvious postcard angle. From above, you’ll likely notice how ocean, coastline, and clouds interact—and the guide will point out the parts worth photographing.
There’s also a secret photo stop on the route. It’s short—another photo stop around 20 minutes—but it’s there for a reason. Often, these surprise stops are the moments that keep your photos from looking like everyone else’s. If you’ve done Waikiki-only sightseeing before, you’ll feel the difference when the day turns from city views into dramatic coastline and mountain terrain.
And here’s what I’d expect you to appreciate: the guide doesn’t just drive to pretty places. They help you practice choosing a subject. That’s the difference between a snapshot and a photo that actually tells a story.
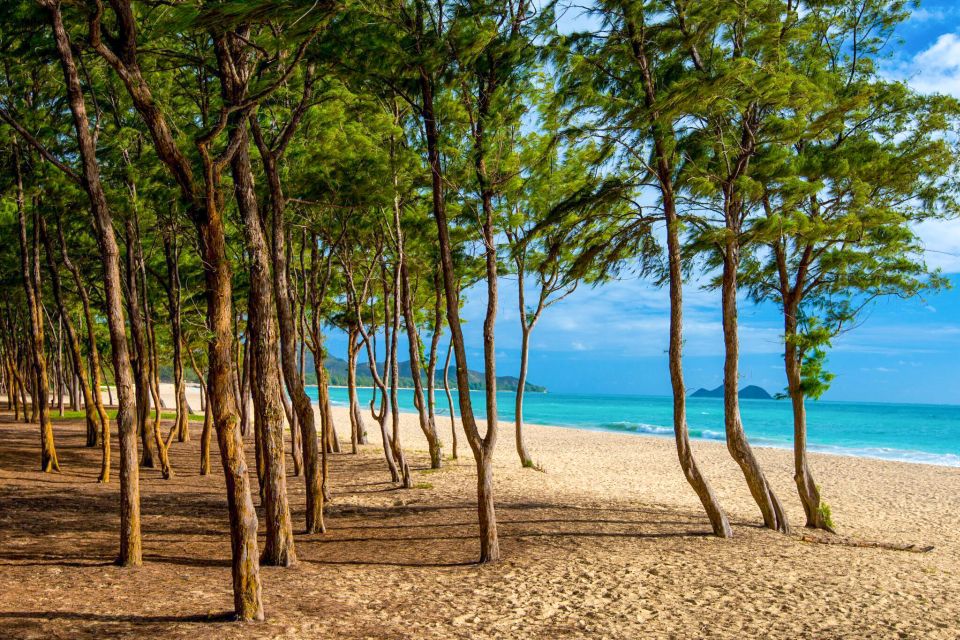
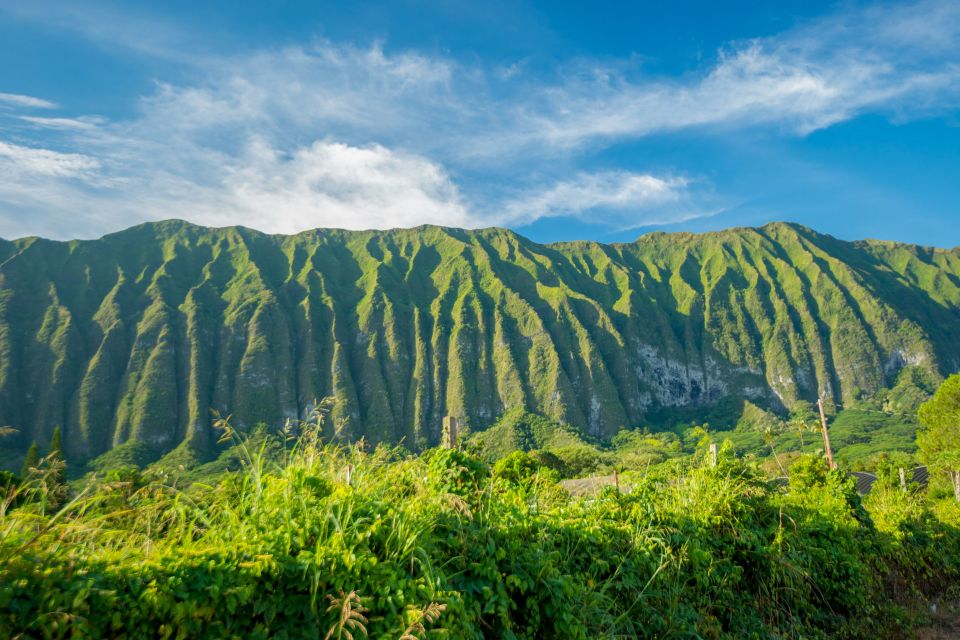
Waimānalo Bay and Ono Steak and Shrimp: the lunch stop with local energy
Then you get to Waimānalo Bay. This area shifts the tone. Instead of only looking up at cliff views, you’re looking across a wide stretch of coast and sky, with the Ko’olau Mountains nearby. It’s a great place for softer lighting too, since you’re dealing with a blend of sea, sand, and mountain shapes.
You also get an actual lunch stop in Waimānalo at Ono Steak and Shrimp Shack. Lunch is about an hour. Food isn’t included, so you’ll order from what’s available and pay on your own. But the payoff is that it’s not a generic tourist meal. It’s timed right in the middle of the tour so you can refuel without losing your prime daylight.
What to watch for: this is a working local restaurant stop. That means more casual pacing than a sit-down place, and you’ll want to plan for the fact that you’re eating during a busy time of day. If you’re the type who hates waiting, show up ready to order and relax. The guide keeps the day moving, but they also make room for photos.


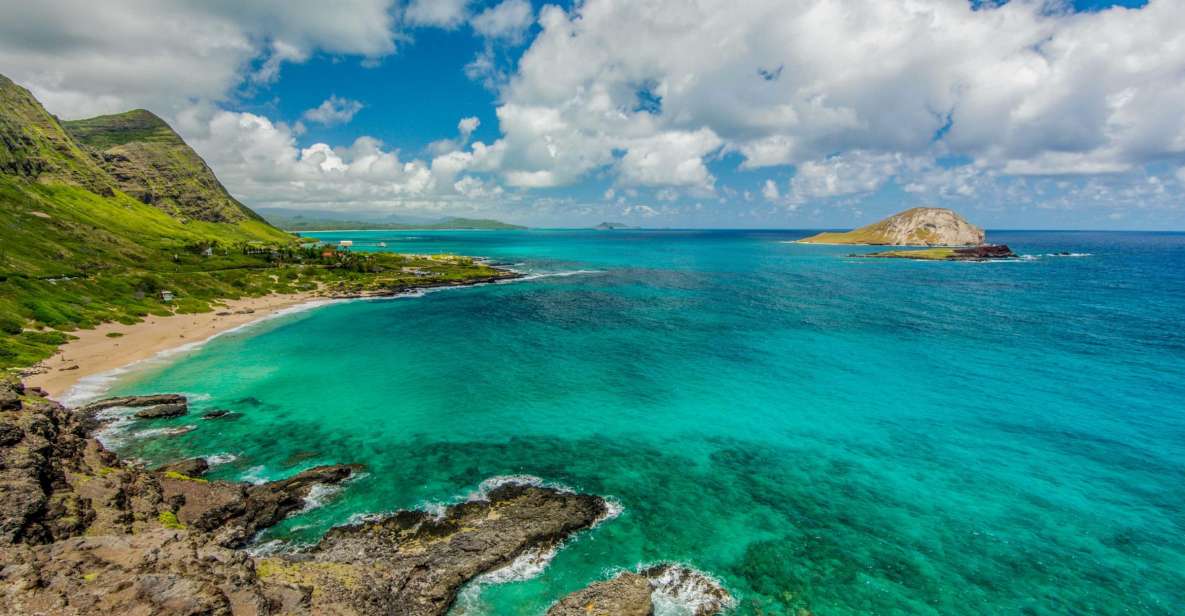
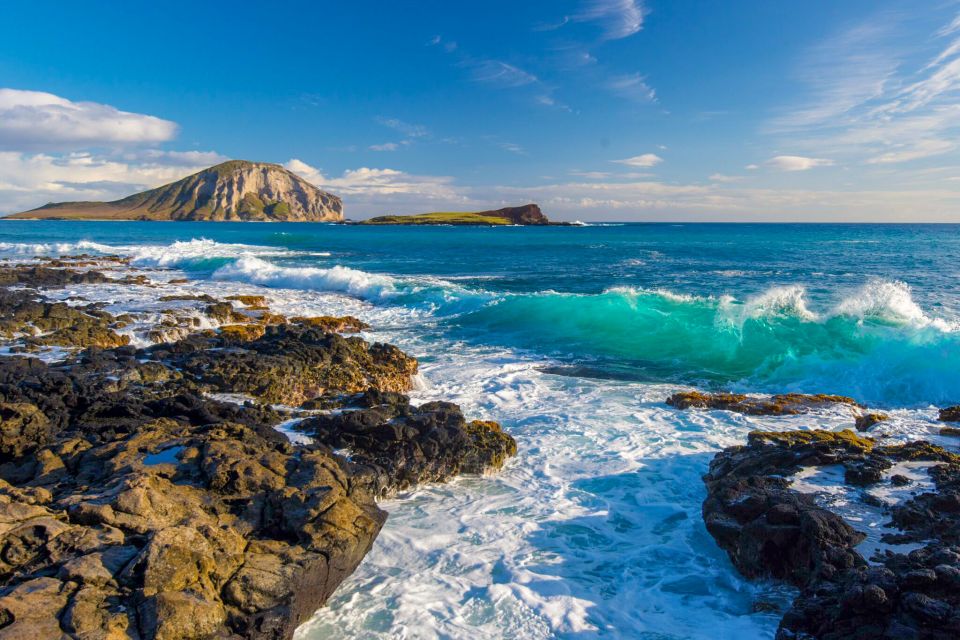
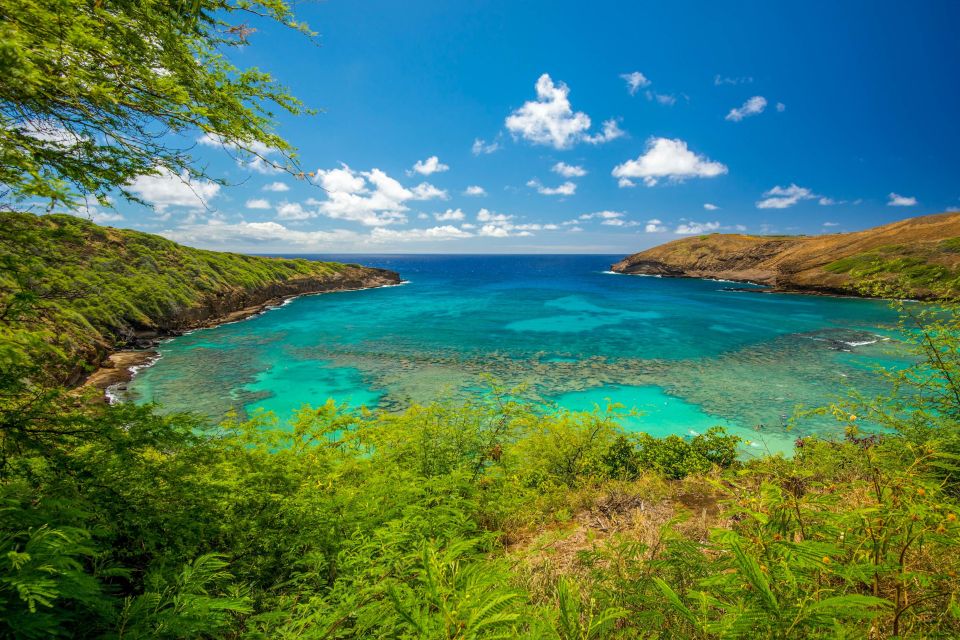
Makapu’u Point and Halona Beach Cove: sea cliffs that don’t need filters
Next up is Makapu’u Point, where you’ll take photos from a lookout for about 20 minutes. If you’ve ever tried to photograph ocean cliffs in harsh sun, you know it can turn into blown-out highlights fast. This is exactly why a pro guide helps. You’ll learn how to manage light and composition so the colors and shapes hold up.
Then you head to Halona Beach Cove for another photo stop (around 15 minutes). This is the area where the scenery is so dramatic that your camera suddenly feels more honest. The coastline curves, the cliffs layer, and the ocean looks different depending on your angle.
One practical tip you’ll likely hear during the day: don’t just shoot what you see straight on. Try one step to the left, one step to the right, and change your framing so you include a foreground element or a leading line. At places like these, tiny movements can mean a totally different photo.
You’ll also see why this tour is labeled as a best-of Oahu approach. It’s not only about views; it’s about placing you at viewpoints that naturally form strong “photo compositions.”
Sandy’s Beach and the Halona Blowhole: the stop that turns heads
After the coastline viewpoints, you’ll make a stop at Sandy’s Beach Lookout, then continue to the Halona Blowhole. The blowhole area is the showstopper if you love sea features. The tour includes time at the blowhole so you can shoot it properly—again, not just for one quick moment.
Why this stop is worth it: the blowhole is motion. Oceans don’t stay still, and that’s where your camera technique becomes real. If you’re using a phone, you’ll want guidance on how to frame the action and avoid blurry disappointment. If you’re using a camera, you’ll likely be encouraged to try different shutter speeds or burst timing, depending on what you brought.
The guide style really helps here. People who’ve done this tour before often mention that the guide supports everyone’s level—from first-time phone shooters to more serious camera users. The atmosphere is friendly, and you’re not stuck feeling like you must get it right instantly.
And yes, weather can change the experience. If the ocean is calm or the light is different than expected, the guide adjusts and keeps you shooting.
Hawaii Kai and Leonard’s Malasada: ending with a sweet win
Near the end of the route, you’ll pass through Hawaii Kai. It’s a nice gear shift after the cliff-and-blowhole intensity. Then, you finish with a local treat: Leonard’s Bakery Malasada truck. This snack stop is around 20 minutes.
Malasada is the kind of finish that makes the day feel complete. You get the photos, you get the sights, and you end with something that tastes like Oahu. It’s also a good moment to review your earlier shots with the guide’s help—if you’re still not sure what worked, this is a low-pressure time to ask.
Price and value: $99 for views plus real coaching
At $99 per person for about five hours, this tour is priced like a good “support your photo skills” day, not like a luxury private driver experience. Here’s what you’re getting for the money:
- Pickup and drop-off around Waikiki (and cruise terminals)
- A professional photographer guide who provides tips throughout the day
- Multiple major East Oahu photo stops with time to actually shoot
- Lunch included as an on-site option (food itself not included) plus a Malasada treat
The value comes from the coaching and the pacing. If you had a rental car, you could hit the lookouts—but you’d probably spend more time figuring things out on your own, and you’d miss a lot of the composition and settings guidance that makes the images better.
Also, small group size helps you feel like the guide is working for you. People mention that they never felt rushed and that there was time to explore each stop. That’s part of what you’re paying for: not just the route, but the attention.
What to bring, and what to keep out of the way
Bring what you need to stay comfortable for outdoor stops:
- Comfortable shoes with grip
- Sunscreen
- Weather-appropriate clothing
- Closed-toe shoes
You should also consider bringing water of your own. Water isn’t included. And there’s no luggage or large bags allowed, so pack light. A small day bag is usually the safest bet.
If you’re thinking about your camera setup, don’t overthink it. The tour is designed so you can show up with what you have—DSLR, mirrorless, compact, or phone—and still get value. Guides often help with both still photography and phone camera settings, and some guides are known for sharing tips that go beyond photos into action-style video techniques.
Who this tour fits best (and who should skip it)
This is a strong choice if:
- You want the best East Oahu viewpoints without renting a car
- You care about taking better photos, not just collecting memories
- You want small-group attention and a relaxed pace
- You’re visiting for only a few days and want a high-impact use of time
It’s also a good option for cruise ship passengers because the tour is built to work from port, with pickup/drop-off locations at cruise terminals.
Consider skipping if:
- You have mobility limitations, since the tour isn’t suitable for mobility impairments
- You hate walking short distances around viewpoints
- You’re expecting food and water to be fully included (they’re not)
Should you book this Oahu photo tour?
If your goal is to leave Oahu with photos that look like you know what you’re doing, I think this is one of the best ways to spend half a day from Waikiki. The combination of pro photo guidance, a small group, and real time at major East Oahu viewpoints is hard to beat for the price.
Book it if you want a friendly, hands-on day with guides like Andrew, Emily, and Kurt who help you frame shots and tweak settings on the spot. Skip it only if mobility is a concern or you want a fully food-and-water packaged deal.
If that’s you, go ahead and reserve. Then pack comfy shoes and bring whatever camera you have. The rest is just showing up at the right spots and shooting with intention.
FAQ
How long is the Oahu photo tour?
The tour lasts about 5 hours.
Does it include pickup from Waikiki hotels?
Yes. Pickup is included from hotels in Waikiki (and there are also cruise pier pickup options). Your pickup will be at the designated bus pull-up area.
Can I bring a phone or any camera?
Yes. You can bring any camera you like, and the guide will help with taking better photos.
What are some of the main stops?
You’ll visit places including Nuuʻuanu Pali Lookout, Makapuʻu Beach lookout, Sandy’s Beach Lookout, the Blow Hole, Waimānalo, and Hawaii Kai, plus stops like Leonard’s Malasada.
Is lunch included?
Lunch is not included as part of the price, but there is a lunch stop at Ono Steaks and Shrimp Shack where you can buy food.
Is water included?
No. Water is not included.
Is the tour suitable for people with mobility impairments?
No. It is not suitable for people with mobility impairments.