REVIEW · OAHU
Oahu: Kaneohe Bay Coral Reef Kayaking Rental
Book on GetYourGuide →Operated by Active Oahu, LLC · Bookable on GetYourGuide
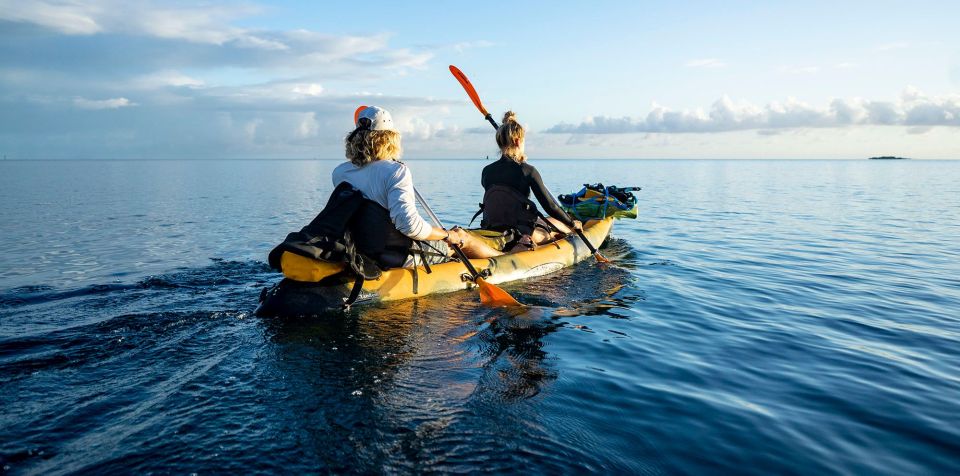
Paddling out here feels like switching worlds. In Kaneohe Bay, you get warm water, coral reef snorkeling, and the dramatic Ko’olau mountain range view from the water, all on a self-guided rental setup. I especially like that you can spend real time on the reef without waiting on a group, and I also like the extra help staff give you before you launch. One thing to consider: you’re going without a guide, so you’ll need to follow the launch rules and keep an eye on your time and comfort in the water.
If you want a flexible half-day plan, this works. You can paddle to the reef zone (after a short start-out paddle), then choose how much time you want for swimming, snorkeling, or just drifting while you watch fish and reef formations. The main drawback is simple: you’ll still have to do the work of paddling out and back, so this is best for people who are comfortable in open water for a while.
Key things I’d plan around:
- Warm, reef-rich Kaneohe Bay waters where coral islands sit close enough for a practical rental day
- Self-guided pacing, so you can snorkel as long as you want and return when you’re ready
- A quick 15–20 minute paddle to reach the reef area past the shallows
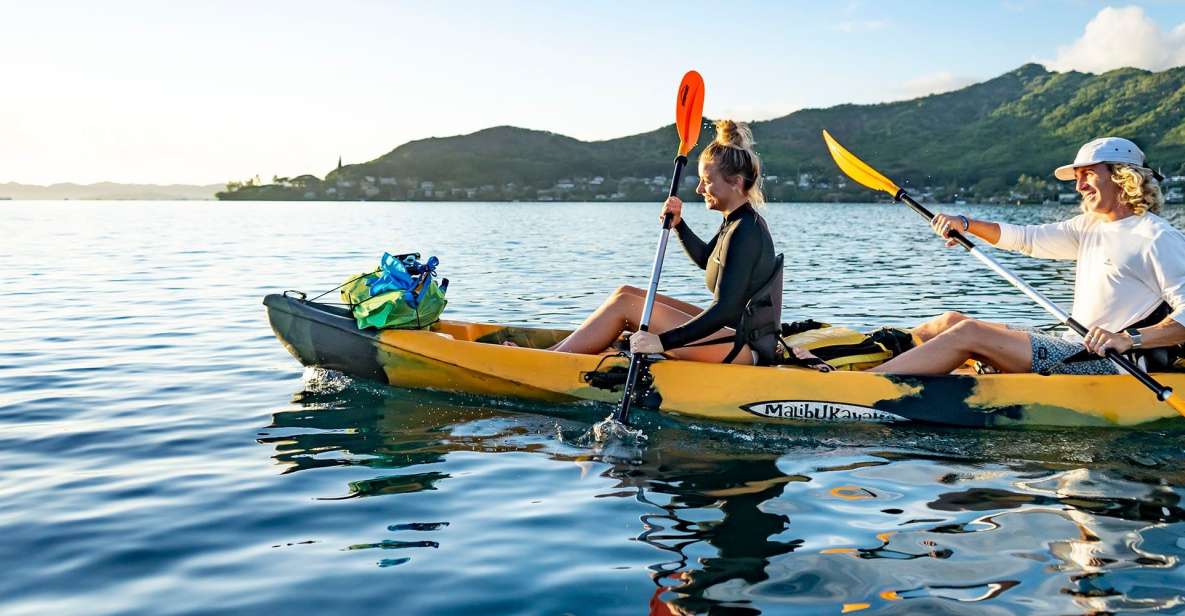
- Snorkel gear and a kayak leash, helping you stay with your boat while you swim
- Potential Hawaiian green sea turtles, with a good chance around the reef and sandbank areas
In This Review
- Why Kaneohe Bay makes this rental feel special
- Kailua pickup, 4-door car, and getting launched
- The short paddle to the coral zone: what “15–20 minutes” really means
- Snorkeling on the outer edges: where the reef does the work
- Wildlife you might see: green sea turtles and reef fish
- Paddling routes: staying close or reaching other nearby reefs
- The reef rules that keep this stress-free
- What’s included for $85: where the value comes from
- Who this kayak-and-snorkel rental is best for
- Quick tips so your reef time goes smoothly
- Should you book this Kaneohe Bay coral reef kayak rental?
- FAQ
- Where do I meet for this Kaneohe Bay kayaking rental?
- How long should I plan for?
- Is there a tour guide with you?
- What gear is provided?
- How far do I paddle before I reach the coral reef?
- Do I need a car to transport the kayak?
- Are there any rules about where I can go?
Why Kaneohe Bay makes this rental feel special
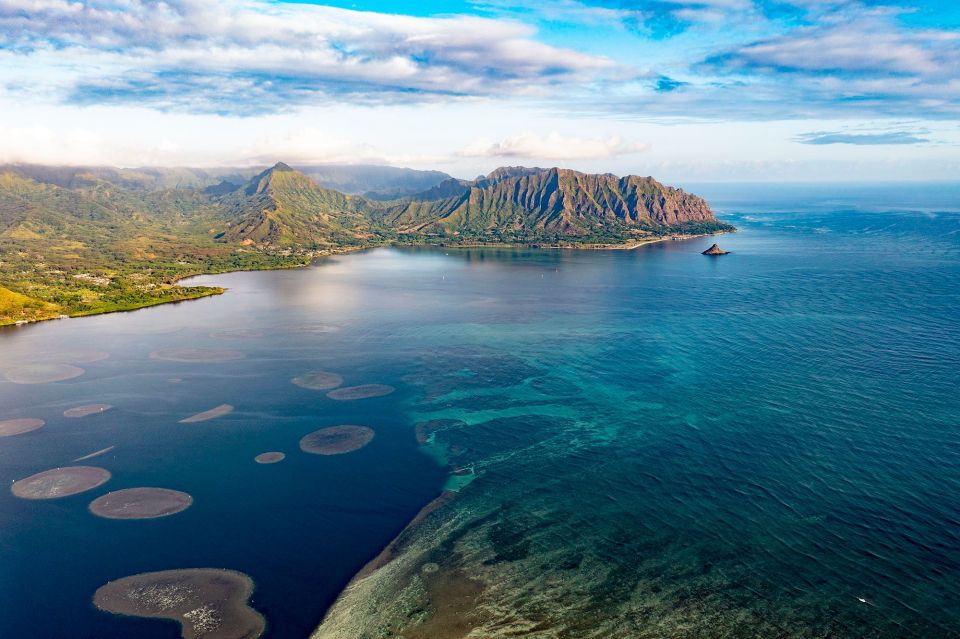
Kaneohe Bay is one of those Oahu places where the water isn’t just pretty, it’s useful. You’re not fighting waves to get to a view—you’re going into a sheltered bay where coral formations sit within easy reach of a kayak. That matters because it turns a “try snorkeling” day into an actual reef-focused outing.
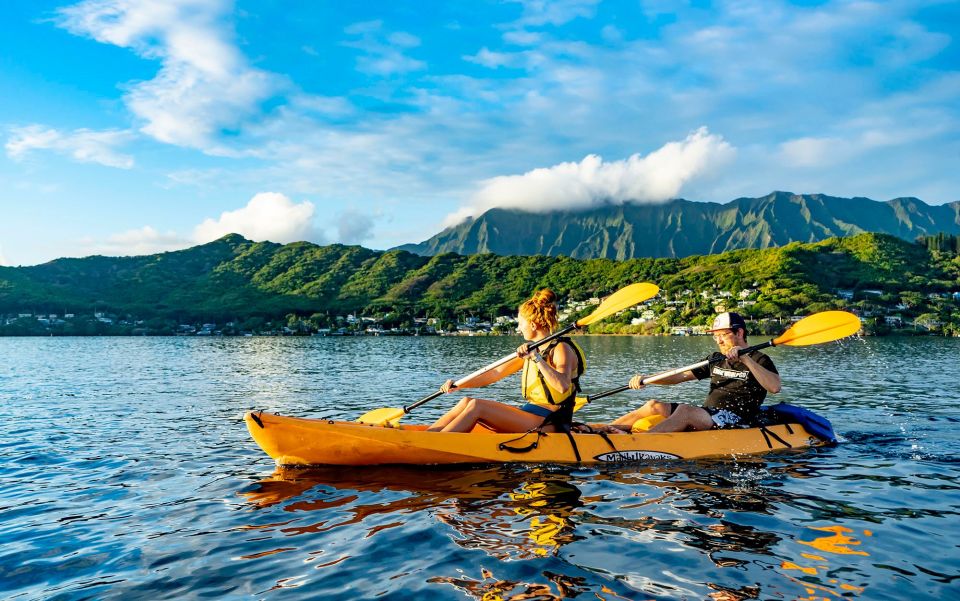
You’ll also get the kind of scenery that land tours can’t match. From the bay, you see the Ko’olau mountain range in a way that looks taller and closer than you might expect, and the whole shoreline feels like it’s drawn in layers: waterline, coral structure, and mountains behind it.
And the best part for many people is the freedom. With no tour guide on the water, you’re not stuck with a strict swim window. You can spend your time where you feel like it—either on the outer reef edges for snorkeling or near the calm spots if you’re just getting your bearings.
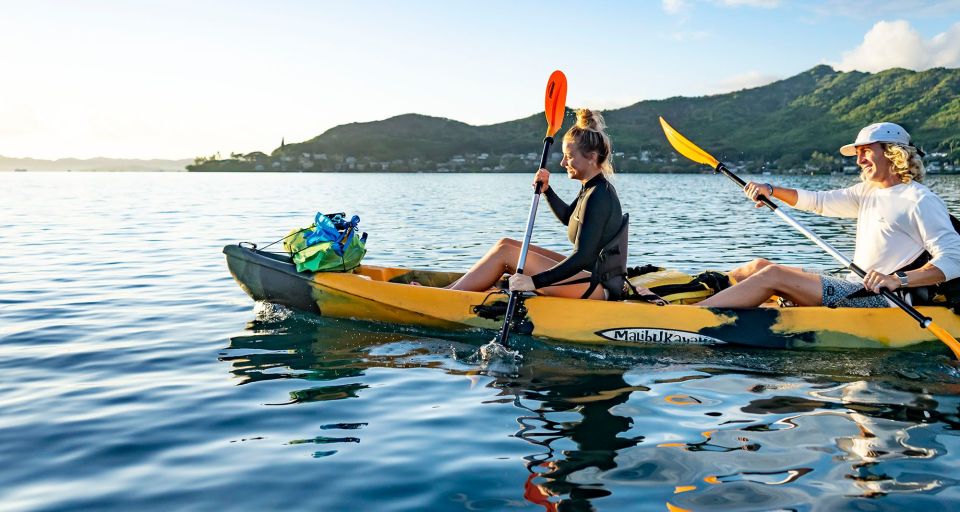
Kailua pickup, 4-door car, and getting launched
This starts in Kailua at the Active Oahu Tours storefront at 134B Hamakua Dr., Kailua, HI 96734. Staff help you with the practical stuff: strapping the kayak to your vehicle and making sure you have what you need before you go.
Two logistics points matter here:
- You need a 4-door car to transport the kayak.
- There’s about a 20-minute drive from the meeting point to the boat harbor, so don’t show up right at the last minute and expect to coast through setup.
Also, the rental is described as having free kayak delivery, and yet the meeting point instructions are very much about picking up your kayak and loading it. Either way, the team is involved at the start, and that’s a good thing. You’re going from parking lot to water without having to figure out straps, loading angles, and gear organization under pressure.
Before you leave the store, double-check your basics: sunscreen, water, and anything you want to keep dry. The operation provides gear you’ll need for the water time, and reviews also mention drybags for belongings and even a smartphone-specific option.
You can also read our reviews of more tours and experiences in Oahu


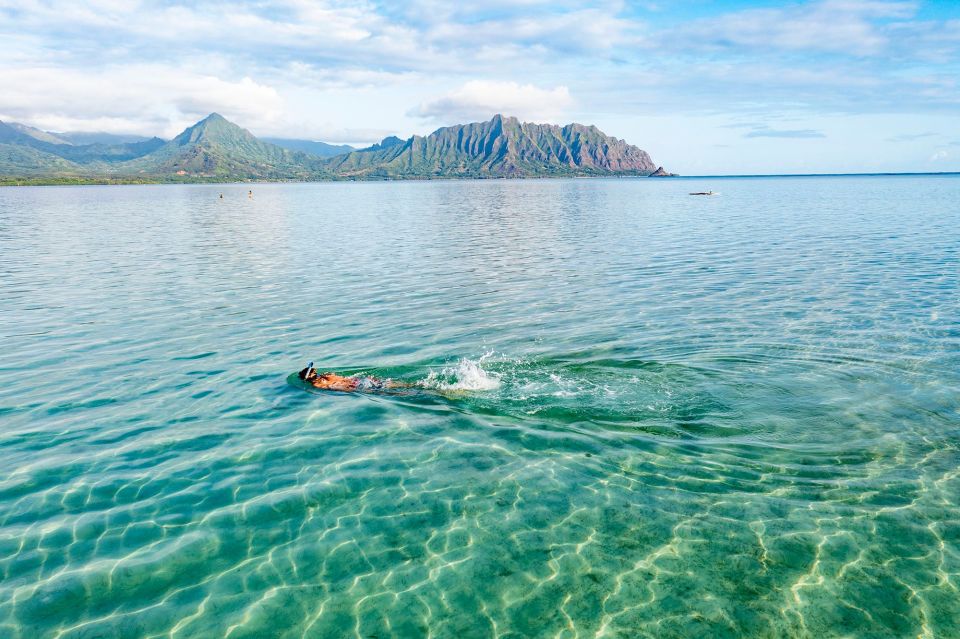
The short paddle to the coral zone: what “15–20 minutes” really means
Once you launch, the plan is simple: paddle out past the shallow area and reach the closest reef in about 15–20 minutes.
That timing is helpful because it tells you what kind of outing you’re getting. You’re not spending the entire afternoon fighting your way to a distant snorkeling spot. Instead, you do a controlled warm-up paddle, then you arrive near where the reef starts to matter.
Here’s what I’d use that paddle time for:
- Get your kayak under control and find a comfortable pace
- Confirm you understand how to use the snorkel setup (once you’re near the reef)
- Adjust your plan so you don’t burn all your energy before you reach the coral
Also, the outer areas are where snorkeling tends to look best. The reef strategy here is all about reaching the right edges—the places where the underwater coral structures meet more active water movement.
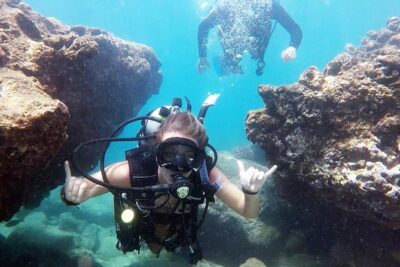
Snorkeling on the outer edges: where the reef does the work
When you reach the reef, this is where the experience clicks. The rental includes snorkel gear, and the setup is designed for you to move at your own pace once you’re in position. The best snorkeling is described as happening along the outer edges of the underwater coral islands.
That phrasing is worth noting. Coral isn’t one flat wall. It’s a complex mix of formations and channels, and the “edges” usually give you a better view because you’re close to both structure and open water movement. You’re more likely to spot fish, reef textures, and the wildlife that calls these spots home.
You’ll also have a kayak leash, which is one of those small items that saves your day. Instead of clambering around and hoping you can keep your boat in sight, the leash helps you stay connected while you swim or snorkel.
And don’t treat this like a rush event. You can choose:
- paddling around the reef
- snorkeling
- swimming
That choice is the whole point of renting versus doing a fixed guided loop. If you’re comfortable snorkeling, you can spend more time floating near coral. If you’d rather just look and paddle, you can keep it relaxed.
Wildlife you might see: green sea turtles and reef fish
This bay is known for sea life, and the rental information calls out the possibility of Hawaiian green sea turtles living around the reef area. Reviews reinforce this with turtles described as a highlight, especially around sandbank areas where you can get spectacular views.
Here’s how to think about wildlife responsibly while still enjoying it:
- Stay calm and slow while you watch
- Don’t crowd the animals or try to swim right up to them
- Use your position from the kayak to get a good look instead of rushing in
If you’re hoping for turtles, timing and stillness matter more than speed. You’re not in a theme park environment here—you’re in an ecosystem. Your best chance usually comes when you slow down long enough for the animals to feel normal around you.
Even if turtles aren’t in your exact viewing window, the reef itself is the show: coral formations, fish activity, and that clear-water feeling people chase on Oahu.
Paddling routes: staying close or reaching other nearby reefs
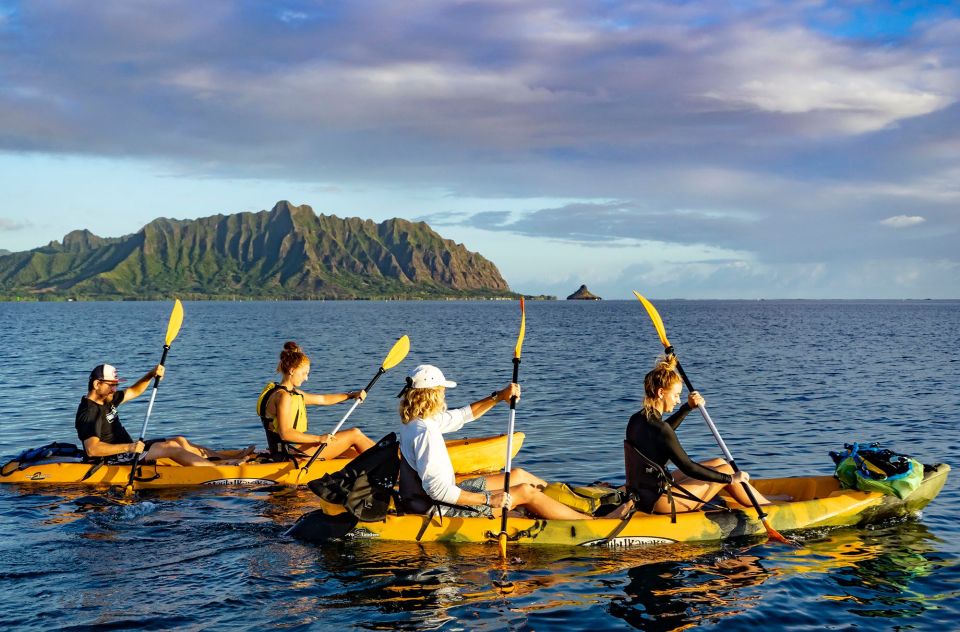
Once you’re out past the shallows, you’re not forced into one spot. The rental setup includes the idea that you can paddle around and to other nearby reefs, since there are several in the area.
This is useful for a couple kinds of travelers:
- If you want variety, you can move between spots until you find your favorite coral edge.
- If you’re not feeling super ambitious, you can stay near the first reef zone and still get a fulfilling experience.
One practical note: the kayak is your tool, and your comfort sets the limit. If the water feels tiring, you don’t need to prove anything by pushing farther. The bay is already rich with what you came for.
And remember: you’re self-guided. That means you’ll want to keep an eye on your return time, especially since you’ll be doing the whole paddling back to the launch area.


The reef rules that keep this stress-free
This kind of activity can get messy fast if people treat it casually. The good news is the rules are straightforward, and they’re there for a reason.
Key guidance includes:
- Do not land the kayak anywhere except the launch location, since many areas around the bay are private property
- Pack out trash if you bring snacks and water
- Don’t leave valuables in your vehicle
These rules aren’t meant to spoil your day. They’re meant to keep the bay clean and keep access clear. If you want a low-stress kayak/snorkel outing, follow the boundaries early and you won’t spend your time second-guessing where you’re allowed to go.
Also, plan your belongings. Reviews mention drybags (including a smartphone drybag), which tells me the operation is aware that people bring small electronics and snacks. Use what they provide and keep the rest of your stuff secure.
What’s included for $85: where the value comes from
At $85 per person for about 4 hours, the value depends on what you care about.
You’re paying for:
- a kayak rental experience with free kayak delivery listed
- a short paddle to Kaneohe Bay’s coral reef area
- spectacular Ko’olau views from the bay
- included snorkel gear to use on the reef
- no tour guide on the water, which effectively buys you flexibility
If you’ve done snorkeling before, you know the main cost is usually the logistics: getting to the water, the gear, and the time on site. This rental package handles those pieces and then lets you control how long you stay in the reef zone.
The “no guide” part can be a pro or a con. For confident swimmers and people who like independence, it’s a real win. For first-time paddlers, it means you’ll rely on your own pace and the initial instruction you receive.
Bottom line: this is good value if you want time on the reef more than you want a narrated history tour.
Who this kayak-and-snorkel rental is best for
This fits best when you want a flexible, reef-focused Oahu outing and you’re comfortable doing your own route pacing.
You’ll likely enjoy it if you:
- like snorkeling and want to spend longer than a quick stop
- prefer self-guided freedom over group timing
- are okay doing a paddle out and back as part of the plan
- want the chance at wildlife sightings, especially green sea turtles
It may not be the best match if you:
- get uncomfortable in open water or with basic snorkeling gear
- need constant coaching to stay confident
- are looking for an all-in-one guided experience with step-by-step supervision
One more nuance: despite being self-guided, reviews mention the operator takes time and even shares some local story and history. So you’re not totally on your own socially—you just aren’t following a guide’s swim schedule out in the water.
Quick tips so your reef time goes smoothly
A few small choices can make a big difference on a kayak snorkeling day:
- Bring snacks and water if you want, but pack out your trash.
- Protect electronics. Drybags are helpful, and you might get one for smartphone use.
- Start calm. Those first minutes set your comfort before you reach the reef.
- Plan your energy. If you paddle hard early, you might feel it later on the way back.
- Use the kayak leash correctly so you don’t separate while snorkeling or floating.
Should you book this Kaneohe Bay coral reef kayak rental?
I’d book it if you want Oahu’s Kaneohe Bay for what it’s best at: calm kayak access to coral reef edges, snorkeling on your schedule, and a strong chance to see marine life like green sea turtles. At $85, you’re not paying for a guide’s narration—you’re paying for gear, access, and real water time, plus the Ko’olau mountain view that turns the whole bay into a photo scene.
I’d skip it if you need guided instruction nonstop, or if you’re not comfortable paddling and snorkeling for several hours. This is independence-friendly, not babysitting.
If you’re the type who likes choosing your own rhythm, this rental style is a great way to spend your half-day in Kailua and turn “I should snorkel” into “I actually saw the reef.”
FAQ
Where do I meet for this Kaneohe Bay kayaking rental?
You pick up at the Active Oahu Tours storefront at 134B Hamakua Dr., Kailua, HI 96734.
How long should I plan for?
The rental is listed as 4 hours, and you’re encouraged to set aside at least 3 hours for the full Kaneohe experience on the water.
Is there a tour guide with you?
No guide is included. The experience is self-guided after gear pickup and launching.
What gear is provided?
You’ll receive snorkeling gear and kayak gear for the outing, including a kayak leash to keep your kayak nearby while you swim or snorkel.
How far do I paddle before I reach the coral reef?
You should reach the closest coral reef after about 15–20 minutes of paddling, once you’re past the shallow area.
Do I need a car to transport the kayak?
Yes. You’ll need a 4-door car, and the staff help with strapping the kayak to your vehicle.
Are there any rules about where I can go?
You should not land the kayak anywhere except at the launch location. Many areas around the bay are private property, and you should also pack out trash and avoid leaving valuables in your vehicle.